How to Activate Windows Xp Mode in Windows 7
How To: Setup XP-Mode on Win 7 Basic, Premium
One of the more interesting new tools that Windows 7 features is Windows XP Mode. Essentially, Windows XP Mode is a fully functional version of Windows XP that operates within Windows 7, much like how Parallels Desktop works on the Mac. By allowing users to seamlessly run Windows XP applications within Windows 7, application compatibility problems become virtually a thing of the past.
Unfortunately, not all Windows 7 users have access to Windows XP Mode since it is not available in Windows 7 Home Premium and other less costly versions. In this article however, we will walk you through the steps needed to install Windows XP Mode, regardless of Windows 7 version.
Step one: Visit Microsoft's Windows XP Mode download site. Select Windows 7 Professional as your operating system, 32bit or 64bit respectively, and select your language. If you select Windows Home Premium edition, the site will not allow you to download the required files.
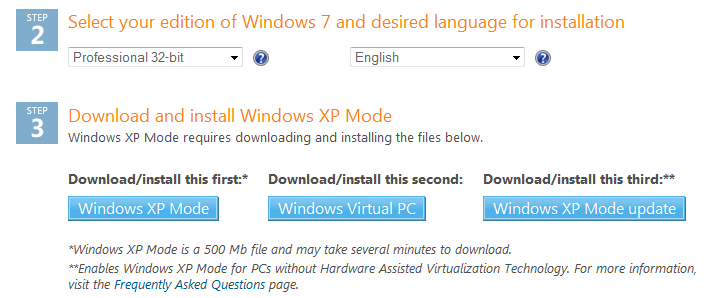
Step two: As the instructions on screen should now state, download and install the three files in order: Windows XP Mode, Windows Virtual PC, and Windows XP Mode update. The site may ask you to install a Windows Activation Update to verify that you have a non-pirated copy of Windows installed, which should be fine for most users to do.
If you receive the error "This update is not applicable to your computer." when trying to install Windows Virtual PC, you may have selected the wrong operating system in step one; try the other Windows 7 Professional option. If you receive the error "Unable to stat Windows Virtual PC because hardware-assissted virtualization is disabled", you can ignore that error for now since the Windows XP Mode update will resolve that issue.
Step three: Once the three files have been installed, you will need to restart your computer.
Step four: At this point, Windows XP Mode is installed, but it will fail to load on a Windows 7 Home Premium system if we try to access it from the Start Menu. To bypass this limitation, we will start by opening up Windows Explorer (the shortcut is Windows Key + e) and navigate to the Windows XP Mode home directory. On most computers this location will be: C:\Program Files\Windows XP Mode\
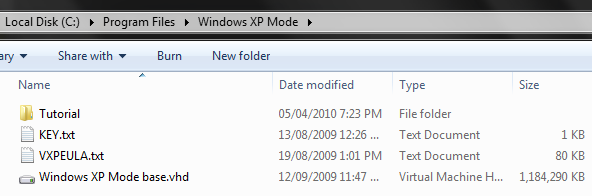
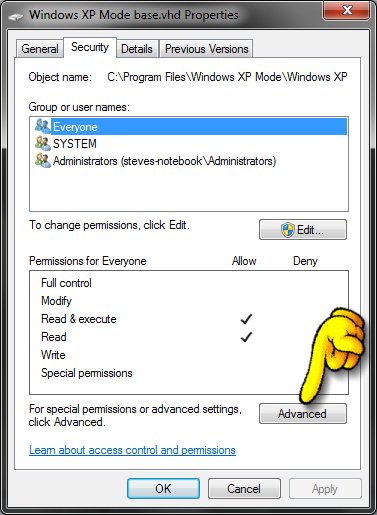
Step five: Right click the file entitled Windows XP Mode base.vhd and select properties. We currently lack the permissions needed to remove the read-only attribute that is preventing us from modifying this file, but we can fix that. Click the Security tab and then click the Advanced button.
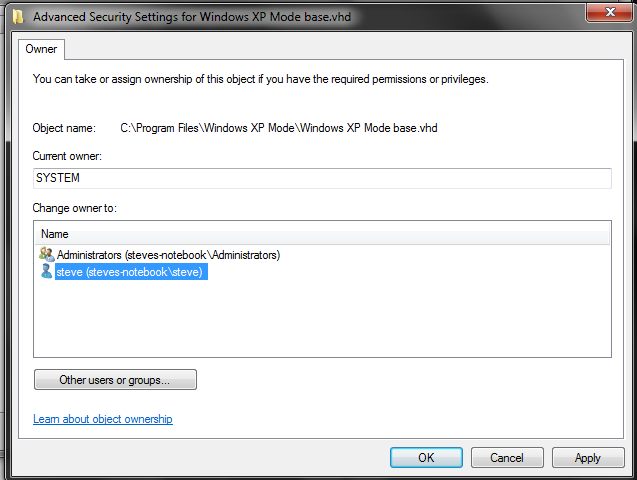
Step six: In the Advanced Security Settings window, click the Owner tab and click the Edit... button. Accept any security pop-up.
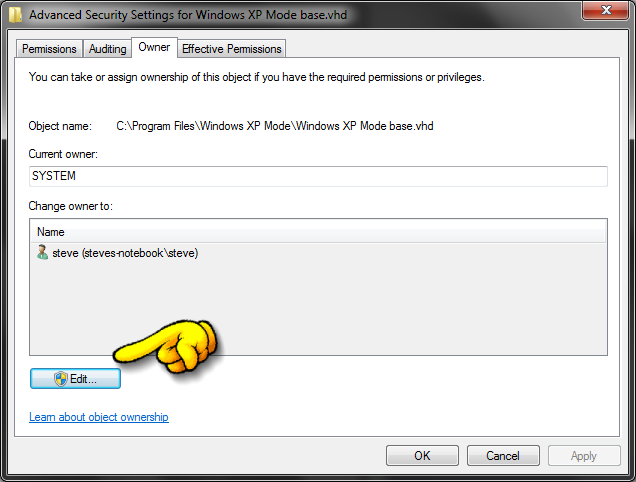
Step seven: In the Advanced Security Settings window, select your current Windows user name from the list. In this example we will select steve as the user name, but that will likely vary from user to user. Once the name has been selected, click OK. If a Windows security message pops up, click OK on that too.
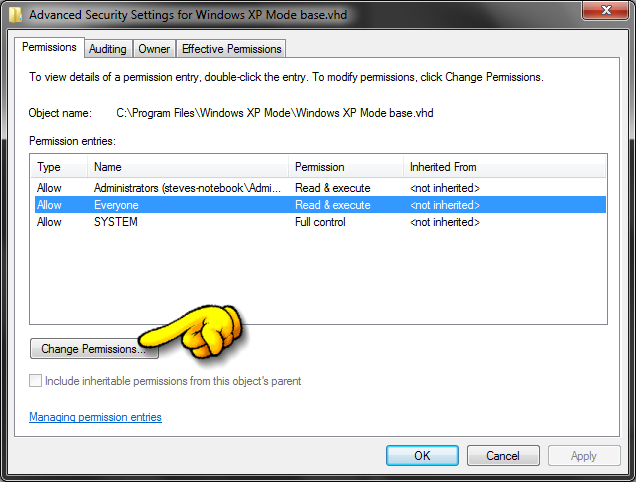
Step eight: Back at the main Advanced Security Settings window, click the Permissions tab. Select Everyone from the Permissions entries box and then click the Change Permissions button.
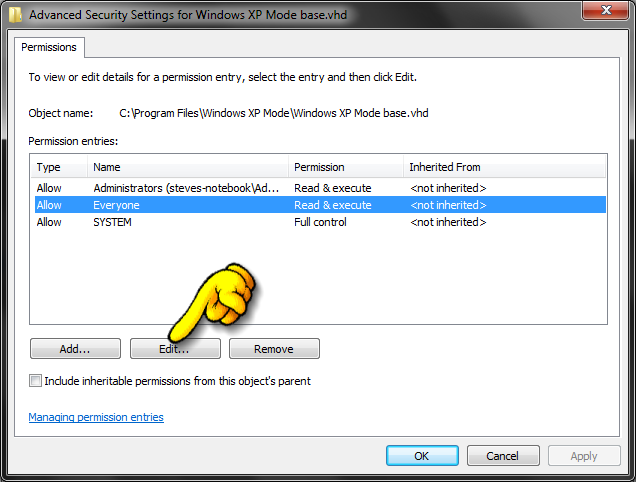
Step nine: Select Everyone in the Permissions entres box and then click the Edit... button.
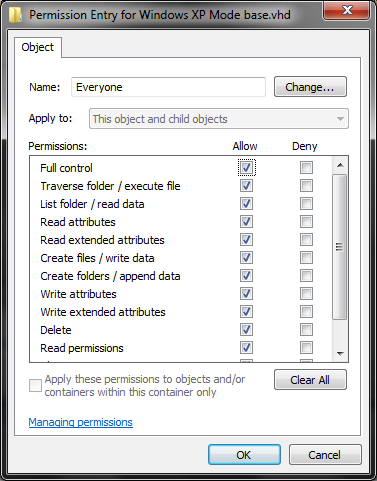
Step ten: In the new window, check the box for the Full control permission. This should set all the permissions to Allow automatically.
Step eleven: Click OK, then OK again, then again, then again and then again once more. You should now be out of all the property setting windows for the file we have just taken ownership of and be back in Windows Explorer. It is now recommend that you create a backup copy of the Windows XP Mode base.vhd file, which will be useful to have if you ever choose to restore your Windows XP virtual environment back to a fresh state.
Step twelve: Click Start > All Programs > Windows Virtual PC > Windows Virtual PC. In the window that opens, click Create virtual machine from the toolbar.
Step thirteen: In the new Create a virtual machine window, enter any name for your Windows XP mode virtual machine and then click Next. Unless you wish to change how much memory your virtual machine will use, just click Next again.
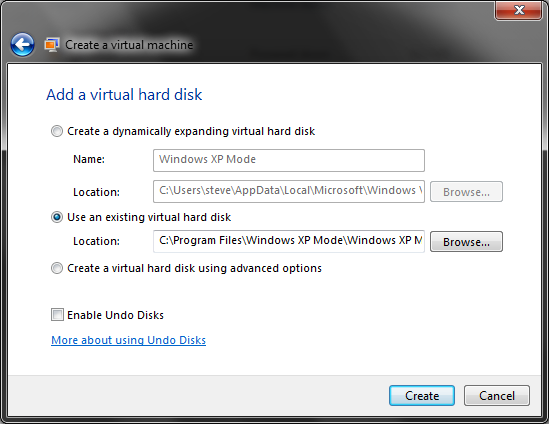
Step fourteen: When at the Add a virtual hard disk step of the virtual machine setup, select Use an existing virtual hard disk and then click the Browse button. We want to locate and select the Windows XP Mode base.vhd file that we were modifying earlier, which is usually located in the C:\Program Files\Windows XP Mode\ folder. It is up to you if you wish to enable the undo disks option also. Click Create when done.
Step fifteen: We should now have Windows XP Mode installed on our system in a functioning form. To access the virtual Windows XP environment, simply double click the newly created virtual machine file listed. You can now also replace the non-functioning Windows XP Mode shortcut listed in the Start > All Programs > Windows Virtual PC menu with a link to your new working virtual machine.
As a side note, it is important to realize that although Windows XP Mode is now installed, the Windows XP virtual machine will be without a valid license and will be subjected to a limited time grace period before requiring activation. While there are a slew of clever ways to bypass this activation problem, the easiest and most recommended way to truly avoid all these issues is to simply upgrade from Windows Home Premium to Windows Professional. Upgrading also entitles you to other added features, such as host-side Remote Desktop and increased maximum RAM support.
How to Activate Windows Xp Mode in Windows 7
Source: https://www.tomshardware.com/news/windows-xp-mode-windows-7-win7,10213.html